


Let me guess. You’re here because you’re planning to install a fresh copy of Windows on your system, right? You’re on the right track. In this guide, I’ll walk you through how to install Windows 10 using a USB drive, step by step. It’s much easier than it sounds, even if you’ve never done it before. Just read carefully and follow the instructions.
System Requirements
Before we move on, take a moment to check the system requirements. If your PC or laptop doesn’t meet them, it’s best to upgrade first to avoid issues during installation.
| Component | Minimum Requirements | Recommended Requirements |
|---|---|---|
| Processor | 1 GHz or faster processor or System on a Chip (SoC) | 2 GHz or faster multi-core processor |
| RAM | 1 GB for 32-bit or 2 GB for 64-bit | 4 GB or more |
| Hard Disk | 32 GB | 64 GB or more |
| Graphics | DirectX 9 or later with WDDM 1.0 driver | DirectX 10 or later with WDDM 1.1 driver |
| Display | 800×600 | 1366×768 or higher resolution |
| Internet | Internet connection for updates and online features | Broadband Internet connection for updates |
| Other | Microsoft account and internet access required for some features | Microsoft account and internet access required for some features |
1) Download the ISO file
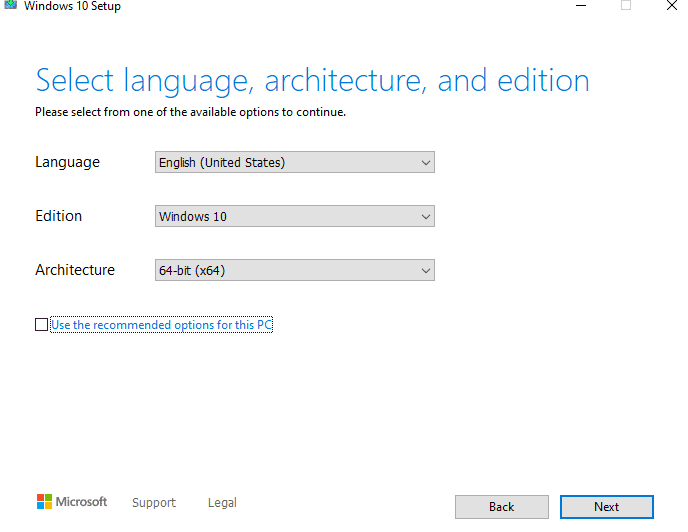
First, you need a Windows 10 ISO file, and then we will boot from your USB. To do so, go to the official Microsoft website or use the Media Creation Tool to grab it. Carefully select the 32-bit or 64-bit version depending on your hardware. Once done, connect your USB to your PC and move towards the next step.
2) Make USB Drive Bootable
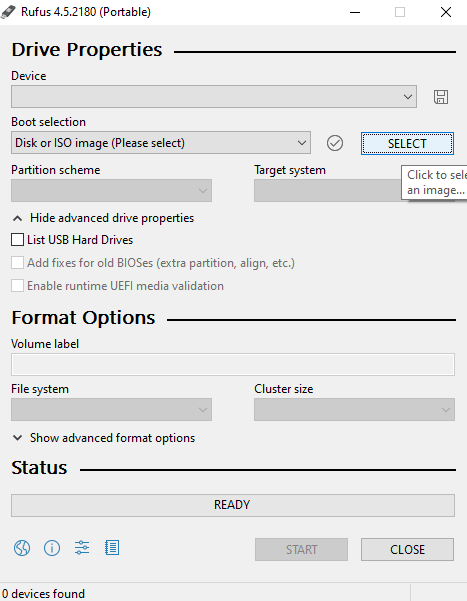
Now download and install Rufus on your PC. Open the program and select the ISO file, choose the device, and change the format to NTFS. Then click on the start button and wait for the process to complete (usually takes 3-4 minutes, but depending on the data transfer speed). Once the progress line finishes, close the program and restart your computer.
Also Check: Fix Windows Key Not Working on Windows
3) Installation
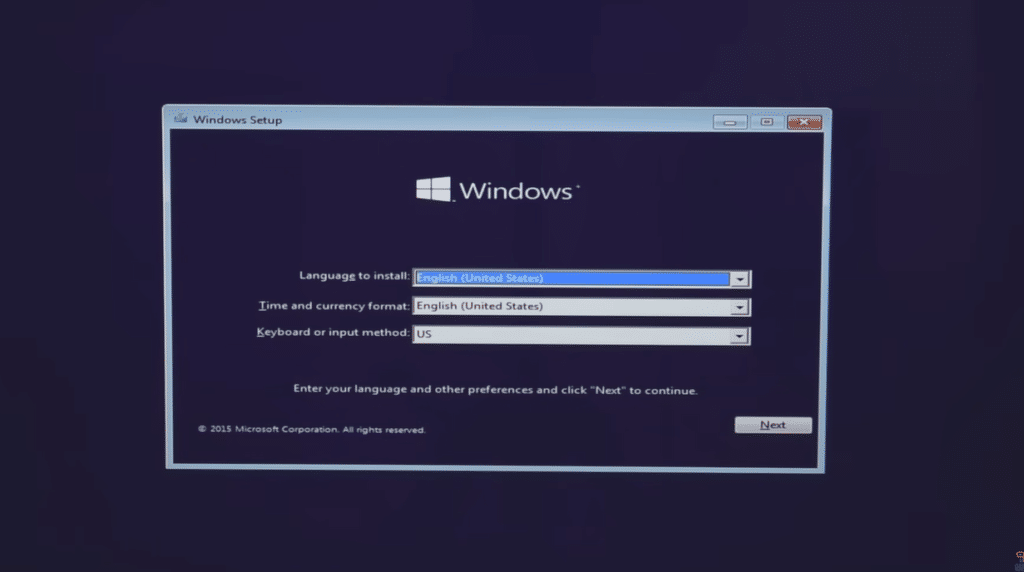
Now turn on your computer and repeatedly press the Esc/F10/F12/Del key to enter in Boot Menu (depending on your manufacturer). Select the USB drive and press Enter. The Windows logo screen will appear, then the installation portal will open.
- Select the “Language, Time format, and keyboard” and press Next
- Press the “Install Now” button.

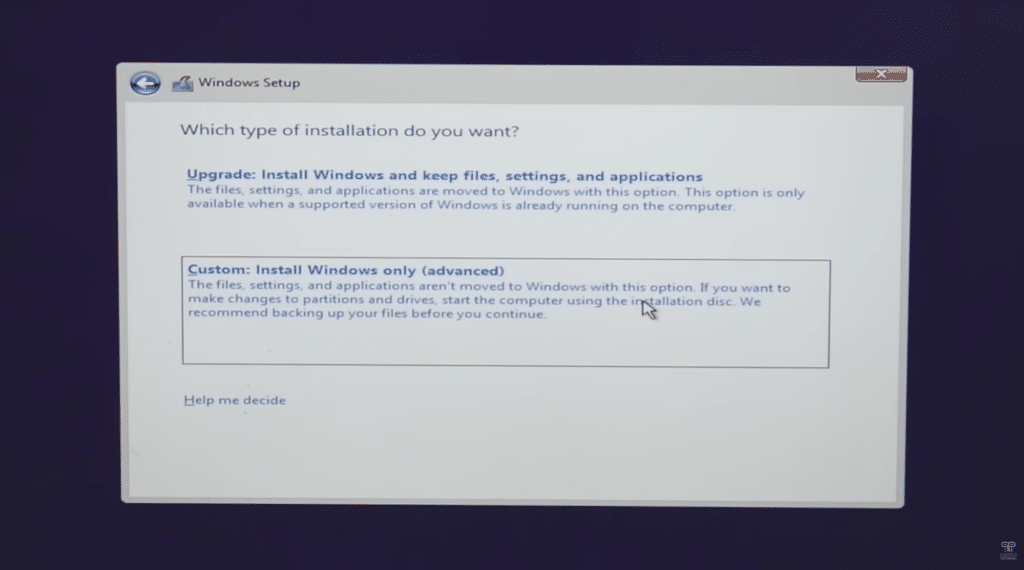
- Now select “Custom: Install Windows Only” from the menu.
- At last, select the drive or create a new one, then press Next. (In this step, you can manage your partitions such as format, delete or create it.)
- Now your Windows will be Installed Automatically
Note: Your PC will restart several times during Installation.
If you are still confused, please watch the video below:
Activate your Windows 10 with a Product Key
Once the installation is done, it’s time to activate it with your Product Key. If you don’t have one, you can purchase one via the official Microsoft website or via a trusted third-party reseller. Then go to settings, and navigate to the “Activation” tab from the left menu. Now, click on Change Product Key and enter your key. After that, your Windows will be activated, and a message will display showing “Your Windows is Activated with a digital license”. You can link it to your Microsoft account, so you never lose it.
Final Words
Now your Windows is easily installed with the help of a USB. Just three simple steps: download the ISO file, make the USB bootable, and install Windows with the Boot menu. After installation, activate it with the activation key. It’s all done now. If you need any assistance, just leave a comment we will give you a solution ASAP.